📐 "First 50 Enterprise Queries Get Custom 3D Warehouse Design" Plan

The Indispensable Guide to a Flawless Warehouse Racking Installation: Mastering the Ultimate Checklist
In the high-stakes world of logistics and warehousing, the difference between a profitable, fluid operation and a costly, hazardous bottleneck often lies not in the racking purchased, but in the precision of its installation. A superior warehouse racking setup checklist serves as the critical blueprint, transforming a collection of beams and uprights into a safe, scalable, and high-performing storage asset. For operations targeting high-density storage solutions, the margin for error is virtually zero.
This comprehensive guide delves into the intricacies of a professional warehouse racking setup checklist, detailing a phased approach that guarantees structural integrity, operational safety, and seamless integration with automated systems. By adhering to a meticulous warehouse racking setup checklist, businesses in emerging markets like Southeast Asia, the Middle East, Africa, and Latin America can build a foundational advantage, turning their storage infrastructure into a driver of efficiency and growth.

Understanding the Gravitas of a Structured Setup Process
The installation of warehouse racking is a pivotal moment where design meets reality. A haphazard approach, lacking a rigorous warehouse racking setup checklist, invites a cascade of problems: reduced storage capacity, persistent product damage, safety violations, and exorbitant future retrofit costs. Conversely, a methodical process, governed by a detailed warehouse racking setup checklist, ensures the system performs as engineered from day one.
This checklist is not merely a list of tasks; it is a holistic project management and quality assurance protocol. It encompasses site evaluation, safety governance, precision assembly, automation readiness, and long-term maintenance planning. For companies investing in drive-in racks, push-back systems, or pallet shuttle technologies, the complexity multiplies, making a thorough warehouse racking setup checklist non-negotiable. It is the single most effective tool for mitigating risk and protecting a significant capital investment.
Phase 1: The Foundational Audit – Preparing the Canvas
Every masterpiece requires a stable canvas. The initial phase of any professional warehouse racking setup checklist involves a rigorous pre-installation audit of the site. This stage, often overlooked in the rush to erect steel, determines the long-term viability of the entire storage system.
Site Integrity and Floor Compliance Analysis: The warehouse floor is the literal foundation. A comprehensive warehouse racking setup checklist must mandate a professional floor flatness (FF) and levelness (FL) survey using laser-guided equipment. For high-density or automated storage involving narrow-aisle forklifts or AGVs, tolerances are exceptionally tight. The checklist should specify acceptable FF/FL ratings (e.g., per ACI 117 standards) and outline remediation steps—such as grinding or topping—if the floor fails inspection. Furthermore, verifying the slab’s load-bearing capacity for concentrated point loads, not just average distributed weight, is a critical entry in the warehouse racking setup checklist, especially for multi-tiered mezzanine integrations.
Holistic Warehouse Environment Assessment: A proficient warehouse racking setup checklist looks beyond the floor. It includes mapping all overhead and structural obstructions: sprinkler heads, lighting, HVAC ducts, and power lines. The checklist must ensure the proposed racking layout and the mast heights of future automated guided vehicles (AGVs) or narrow-aisle forklifts maintain mandated clearances. Additionally, for climate-sensitive goods, the warehouse racking setup checklist should consider airflow, ensuring dense racking rows do not create pockets of stagnant air that compromise temperature or humidity control.
Phase 2: Embedding Safety into the Protocol’s DNA
Safety must be engineered into the process, not appended as an afterthought. The safety component of a warehouse racking setup checklist is a standalone operating procedure, designed to protect personnel and equipment.
Pre-Installation Safety Briefing and Zone Establishment: Before any work commences, the warehouse racking setup checklist requires a formal Job Hazard Analysis (JHA) conducted with the installation crew and site management. This identifies risks like falling components, pinch points, and forklift traffic. Concurrently, the checklist must mandate the establishment of clearly marked, physically secured exclusion zones around the installation area to prevent unauthorized access.
Component Verification and Systematic Staging: Upon delivery, the warehouse racking setup checklist dictates a meticulous audit. Every component—uprights, beams, braces, connectors—must be cross-referenced against shipping manifests and engineering drawings for quantity and specification. A visual inspection for transit damage (bends, cracks, stripped threads) is crucial; the checklist must state unequivocally that damaged parts are not to be installed. Furthermore, the checklist should outline a logical staging plan, organizing components around the site in the order of assembly to minimize movement and confusion, a simple yet vital step for efficiency and safety.
Phase 3: The Precision Assembly Protocol
This is the heart of the warehouse racking setup checklist, where theoretical tolerances become physical reality. Adherence to torque values, alignment, and sequence is paramount.
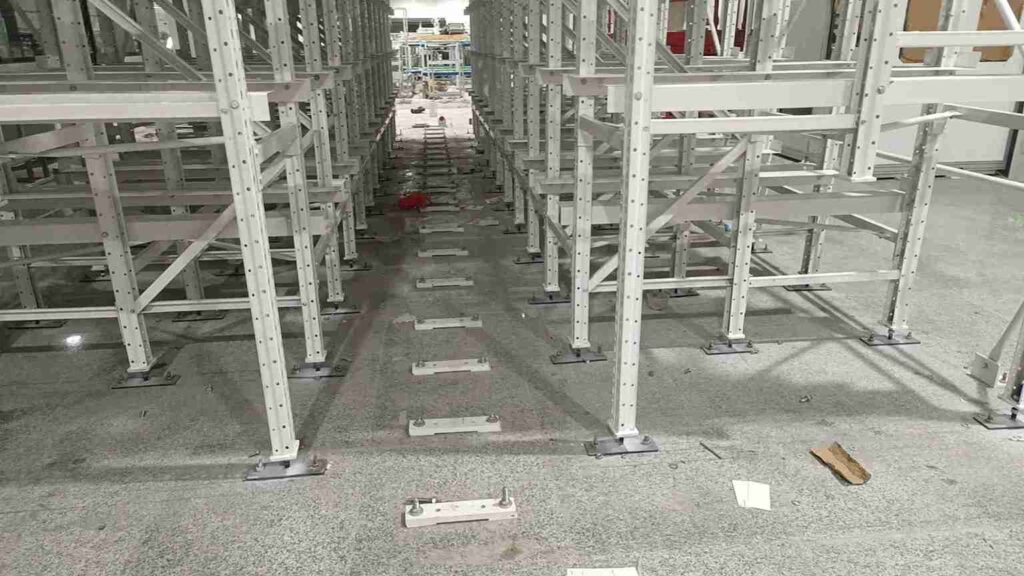
Upright Frame Erection and the Pursuit of Perfect Plumb: The checklist’s instructions begin with footplate anchoring, specifying the exact type (chemical epoxy, mechanical), torque settings, and curing times suitable for the floor composition. The erection of the “first bay” is a benchmark event in the warehouse racking setup checklist. It must be adjusted to perfect plumb and alignment using digital levels and laser plumb lines before serving as the reference for all subsequent bays. The checklist should prescribe the use of taut string lines or transits to ensure continuous alignment across the warehouse.
Beam Installation and Creating a Level Load Path: When installing beams, the warehouse racking setup checklist must emphasize connector engagement—listening for the definitive click of teardrop clips or ensuring all bolts are hand-tight before final torquing. A critical, often missed, step detailed in a professional warehouse racking setup checklist is cross-bay leveling. Using a laser level to ensure beam connectors on opposite uprights are perfectly level prevents pallets from sitting skewed, which induces continuous, damaging stress on the racking.
Calibrated Torquing: The Final Seal: The warehouse racking setup checklist must specify a final torquing sequence (typically a criss-cross pattern) to be performed with a calibrated torque wrench set to the manufacturer’s exact Newton-meter (Nm) specification. This entry is non-negotiable; under-torquing leads to loosening under dynamic loads, while over-torquing can strip threads or deform components.
Phase 4: Automation Integration: Building for the Future
Modern storage is defined by human-machine collaboration. Therefore, a forward-thinking warehouse racking setup checklist incorporates automation readiness from the outset.
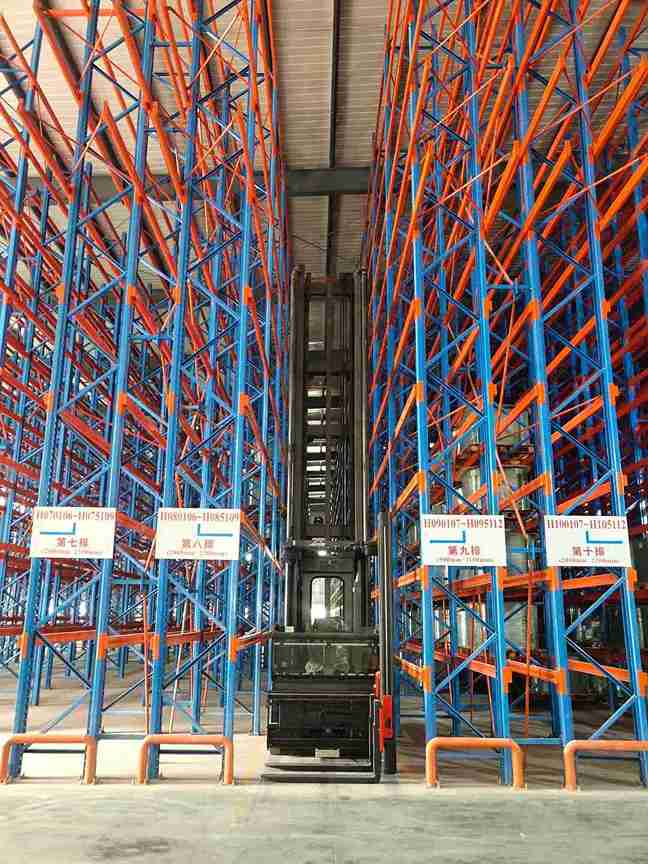
AGV and Automated Forklift Compatibility Verification: The checklist must include post-assembly verification of clear aisle widths against the minimum requirements of the designated AGVs or narrow-aisle forklifts, including sensor and turning radius clearances. It should also mandate a “dry run” where the automation equipment (or a simulated proxy) tests approach angles, fork entry, and placement/docking at various heights and depths. For systems with integrated pallet shuttles or robots, the warehouse racking setup checklist must include testing the movement of shuttles on rails and the interface at pick stations.
Conveyor and Sortation System Interface Points: Where racking interfaces with conveyor systems or automated picking stations, the warehouse racking setup checklist needs to detail the reinforcement of end frames and the precise height alignment of the first beam to ensure smooth, jam-free transfer of loads from conveyor to storage location and vice versa.
Phase 5: Commissioning: The Formal Handover
Installation completion is not the end of the warehouse racking setup checklist. A formal commissioning and sign-off procedure transitions the system from the installer’s responsibility to the owner’s operational asset.
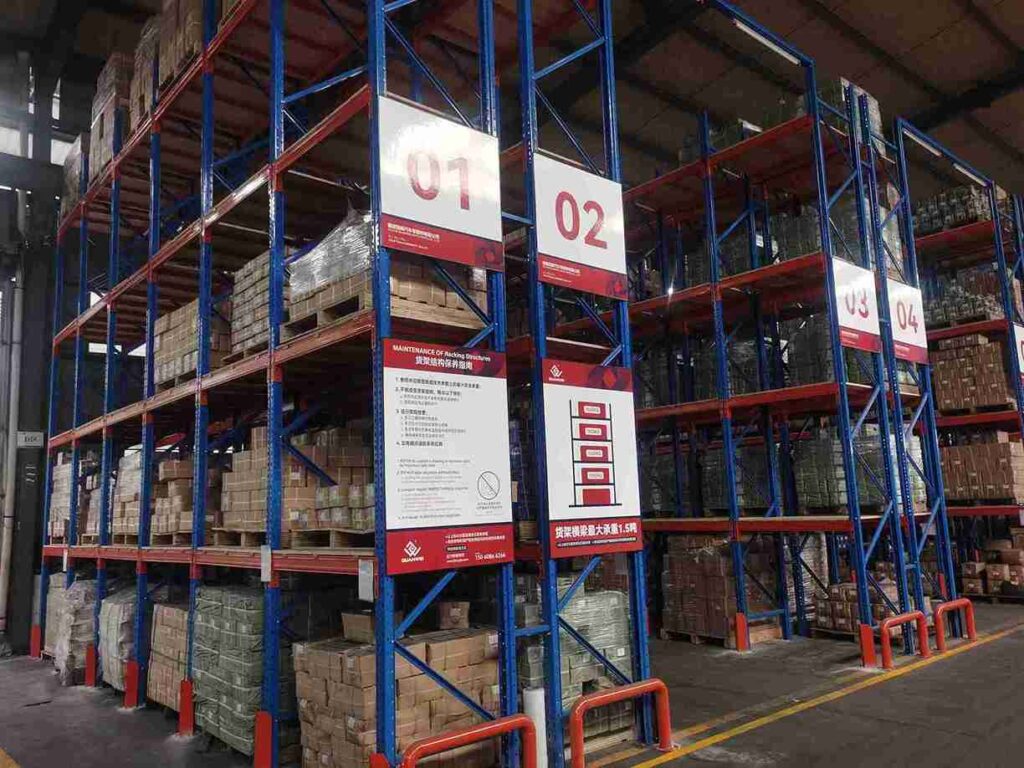
Comprehensive Post-Installation Inspection: A qualified engineer should use a final segment of the warehouse racking setup checklist as a punch list. This involves random-sample anchor torque checks, plumb and alignment verification, inspection of all safety locks, and confirmation that all permanent load notices and bay identification labels are correctly installed.
Documentation Archiving and Operator Training: The concluding administrative task in the warehouse racking setup checklist is the secure handover and archiving of all documentation: “as-built” drawings, structural calculations, manufacturer’s manuals, and warranty certificates. Furthermore, the checklist should confirm that facility operators and managers have been trained on the system’s load limits, basic inspection procedures, and damage reporting protocols.
Phase 6: Designing for Scalability from the Ground Up
A truly strategic warehouse racking setup checklist builds scalability into the initial installation, allowing for cost-effective future expansion.
Modular Expansion Planning: The checklist should include steps like installing expansion-ready end frames and pre-planning the routing of electrical/data conduits to adjacent expansion areas. It may also recommend creating a small on-site inventory of system-specific critical parts (special connectors, shuttle carts) to expedite future growth.
Adapting to Technological Evolution: The warehouse racking setup checklist can advocate for design choices that accommodate not just today’s technology but tomorrow’s. This includes specifying adjustable beam levels, allowing for changes in pallet profiles, and ensuring aisle dimensions can handle future generations of robotic picking equipment.
Phase 7: The Longevity Protocol: Inspection and Maintenance
The ultimate warehouse racking setup checklist extends for the lifetime of the system, providing the framework for ongoing care.
Establishing a Tiered Inspection Regime: The checklist should be used to establish a permanent inspection schedule: visual checks by operators (daily/weekly), formal inspections by supervisors (quarterly), and professional audits by qualified engineers (annually). Resources like the Storage Equipment Manufacturers’ Association (SEMA) codes provide excellent guidelines to append to this section of the warehouse racking setup checklist.
Implementing a Damage Classification and Response System: A vital outcome of the warehouse racking setup checklist is a clear Red-Amber-Green (RAG) protocol for damage. “Red” damage (e.g., a bent upright) requires immediate off-loading and repair with OEM parts. “Amber” damage (a dent beyond a specified depth) is scheduled for repair, while “Green” is cosmetic only. This formalizes response and maintains safety.
Conclusion: The Checklist as a Strategic Imperative
In global markets where logistics efficiency is a core competitive differentiator, a warehouse is only as strong as its racking system. The implementation of a exhaustive, phase-by-phase warehouse racking setup checklist is the most prudent investment an operator can make. It transcends simple assembly, embodying a philosophy of precision, safety, and foresight.
This detailed warehouse racking setup checklist ensures that high-density storage solutions achieve their promised density and throughput, that automation integrates seamlessly, and that the entire asset remains safe and adaptable for years to come. For businesses looking to build or upgrade their storage infrastructure, demanding and executing upon a professional warehouse racking setup checklist is the definitive first step toward operational excellence and sustainable growth.
Frequently Asked Questions (FAQs)
1. Why is a custom-designed warehouse racking setup checklist superior to a generic one found online?
A generic checklist fails to account for critical variables specific to a project: local building codes in Dubai versus São Paulo, floor conditions, the specific type of high-density racking (drive-in vs. pallet shuttle), and the integration requirements of the chosen automation (AGV brand, conveyor type). A custom warehouse racking setup checklist is developed from the project’s engineered drawings and site survey, making it a living quality assurance document tailored to unique risks and requirements.
2. How does climate in regions like the Middle East or coastal Africa influence the warehouse racking setup checklist?
In corrosive environments, the warehouse racking setup checklist must specify enhanced material specifications, such as hot-dip galvanized steel or thicker zinc coatings, and mandate the use of stainless steel hardware. The maintenance schedule within the checklist must also be accelerated, requiring more frequent semi-annual inspections for early signs of rust, particularly at joints and impact points, with protocols for immediate remedial touch-up.
3. Who should own and manage the warehouse racking setup checklist during a project?
While the installation contractor executes the tasks, the checklist must be owned and managed by the client’s project manager or a designated site supervisor. This ensures independent verification, maintains accountability, and provides the client with a clear record of compliance at each milestone. The checklist is a shared governance tool, not a contractor’s internal document.
4. For a multi-phase warehouse expansion, how is the warehouse racking setup checklist applied?
The warehouse racking setup checklist is not a one-time document. For each new phase, the pre-installation audit (Phase 1) must be re-conducted, as floor conditions or building structures may have changed. The checklist ensures new racking ties into existing systems perfectly, that automation pathways remain consistent, and that safety protocols are uniformly applied across the entire growing facility.
5. What are the financial implications of skipping a thorough warehouse racking setup checklist?
The costs are severe and multiplicative. Immediate costs include rework, project delays, and potential safety incidents. Long-term operational costs skyrocket due to reduced storage capacity (inefficient use of space), higher maintenance for misaligned equipment, increased product damage, and premature wear on both racking and MHE. The expense of retrofitting or reinforcing a poorly installed system often exceeds the original installation cost, making the initial investment in a meticulous warehouse racking setup checklist profoundly cost-effective.
If you require perfect CAD drawings and quotes for warehouse racking, please contact us. We can provide you with free warehouse racking planning and design services and quotes. Our email address is: jili@geelyracks.com