📐 "First 50 Enterprise Queries Get Custom 3D Warehouse Design" Plan

Cost-Optimized Beam Racking Layout Planning: How to Increase Storage Capacity by 40% Without Expanding Your Warehouse
Beam racking layout planning represents the single most impactful investment any warehouse operator can make in today’s capital-constrained environment. Across emerging markets from Southeast Asia to Latin America, the Middle East to Africa, industrial real estate costs have escalated to the point where expansion is simply not feasible for most businesses. Yet inventory continues growing, supply chains continue lengthening, and customer expectations continue rising. The solution lies not in building outward but in optimizing upward and inward through professional beam racking layout planning.
This comprehensive guide reveals how warehouse managers can systematically unlock 30-50% additional storage capacity within their existing four walls through strategic application of engineering principles, operational analysis, and automation integration. Drawing from decades of real-world implementation across diverse industries and geographic regions, this resource provides actionable methodologies for transforming underperforming storage areas into high-density profit centers without spending a dollar on bricks and mortar.

1. Understanding the Strategic Importance of Beam Racking Layout Planning
1.1 Defining the Scope and Impact of Professional Layout Planning
Beam racking layout planning encompasses far more than simply arranging shelves within a warehouse. It represents a holistic engineering discipline that harmonizes structural integrity, operational workflow, storage density, and future growth projections within a confined space. When warehouses engage in professional beam racking layout planning, they are essentially performing a comprehensive audit of every cubic meter of available space and developing strategies to extract maximum value from each one.
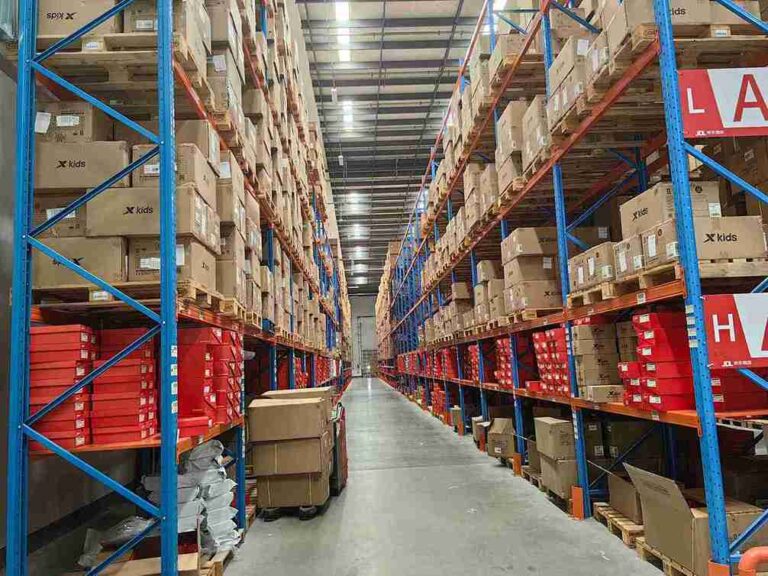
The consequences of inadequate beam racking layout planning ripple throughout an entire operation. Facilities that skip this critical step consistently operate at 60-70% of their potential capacity, with bottlenecks forming in predictable locations and safety risks multiplying exponentially. In markets where every square meter carries significant cost, such inefficiency directly impacts competitiveness and profitability. Professional beam racking layout planning addresses these deficiencies systematically, transforming chaotic storage environments into streamlined operations where product flows naturally and space works overtime .
1.2 The Economic Imperative Driving Layout Optimization
Warehouse operators across Southeast Asia, the Middle East, Africa, and Latin America face unprecedented economic pressure. Industrial rents in major logistics corridors have increased 15-25% annually for five consecutive years, while construction costs for new facilities have escalated even faster. Simultaneously, labor costs continue their upward trajectory and customer expectations for faster fulfillment compress order cycles daily. In this environment, beam racking layout planning becomes the most powerful lever for cost control available to operations managers .
Consider the mathematics: a warehouse occupying 10,000 square meters in a major Southeast Asian industrial park might pay $2.50 per square meter monthly, or $300,000 annually. Professional beam racking layout planning typically uncovers 35-45% latent capacity within that space. This represents an effective expansion of 3,500-4,500 square meters—space that would cost an additional $105,000-$135,000 annually to acquire or $1.5-$2 million to construct. The return on investment for comprehensive beam racking layout planning consistently exceeds 500% within the first year, making it the highest-return investment in supply chain infrastructure .
1.3 Core Components That Define Successful Layouts
Every effective beam racking layout planning initiative must account for five fundamental components that work together as an integrated system:
Upright frames form the vertical backbone of any storage system. During professional beam racking layout planning, engineers specify frame heights based on clear ceiling elevation minus required clearances for sprinklers and lighting. Load capacities must be calculated based on the heaviest inventory items expected over the system’s lifetime, with appropriate safety factors incorporated. Perforations at standard increments (typically 50-100mm) allow future beam adjustments as inventory profiles evolve .
Horizontal beams create the load-bearing surfaces where pallets rest. Critical beam racking layout planning decisions involve beam thickness measured in gauge or millimeters, step dimensions that determine how pallets seat on beams, and safety locks that prevent accidental dislodgement during forklift operations. Beam spans must be optimized for the specific pallet footprints used—typically 2,700mm for two European pallets or 3,600mm for three, though variations exist regionally .
Load distribution elements including wire decking, particle board, or timber supports ensure weight spreads evenly across beam spans rather than concentrating at points that could cause failure. Research demonstrates that proper load distribution during beam racking layout planning can reduce beam deflection by up to 23% while extending system lifespan significantly .
Floor anchoring systems comprising expansion bolts or chemical anchors secure the entire structure to the building slab. In seismic zones across Indonesia, Mexico, and parts of the Middle East, specialized beam racking layout planning must account for local building codes and expected ground accelerations .
Safety accessories including column guards, mesh panels, row spacers, and load notices complete the system. Comprehensive beam racking layout planning integrates these elements from the outset rather than treating them as afterthoughts, ensuring they function as designed rather than creating new hazards.
2. Critical Factors Driving Successful Beam Racking Layout Planning
2.1 Warehouse Dimensional Analysis: The Foundation of All Layout Decisions
Before any meaningful beam racking layout planning can proceed, precise dimensional data must be collected through systematic site survey. Experienced engineers insist on laser-scanned measurements rather than relying on architectural drawings, as actual conditions in facilities across emerging markets often deviate significantly from plans due to construction tolerances, settling, and modifications over time.
Clear ceiling height represents the most valuable resource in any warehouse. During beam racking layout planning, every centimeter of vertical space captured translates directly to additional storage positions. However, engineers must account for sprinkler clearance requirements—typically 500mm below deflectors per fire codes—and lighting fixture locations that cannot be obstructed. Advanced beam racking layout planning positions sprinkler lines between rack rows rather than above them, preserving valuable overhead space that would otherwise be wasted .
Column grid patterns present both constraints and opportunities in existing buildings. Strategic beam racking layout planning aligns rack runs with building columns, potentially sacrificing some storage positions at column locations while maintaining straight, unobstructed aisles throughout the facility. Experienced planners typically position columns within rack depth rather than in aisles, preserving unobstructed forklift travel paths. When columns fall in aisles—a common issue in older facilities—specialized beam racking layout planning creates widened zones that accommodate the obstruction without creating bottlenecks .
Floor flatness and load capacity determine what storage heights are ultimately achievable. High-bay warehouses exceeding 12 meters require exceptionally flat floors meeting FM2 standards or better for safe forklift operation. During beam racking layout planning, comprehensive floor surveys verify capacity for concentrated point loads from fully loaded upright frames. A fully loaded upright supporting 10 pallets at 1,000kg each transmits 10,000kg to the floor through baseplates typically 150mm square—concentrated loads that can exceed floor capacity if not properly distributed .
2.2 Load Capacity Calculations: Engineering for Safety and Performance
The structural integrity of any racking system depends entirely on accurate load calculations performed during beam racking layout planning. This is not an area for approximation or rule-of-thumb estimates, as the consequences of failure include property damage, injury, and potentially loss of life.
Static load capacity refers to the weight a beam can support when stationary and properly positioned. During beam racking layout planning, engineers calculate this based on beam section modulus, steel grade, and span length using formulas derived from structural engineering principles. A typical 2,700mm beam spanning between uprights might support 3,000kg uniformly distributed, but this rating drops as span increases—a 3,600mm beam of identical cross-section might support only 2,200kg .
Dynamic load capacity accounts for forces generated during forklift impacts, load placement, and normal operational movement. Experienced beam racking layout planning incorporates safety factors of 1.5 to 2.0 for dynamic conditions, ensuring the system withstands decades of operational abuse without failure. These factors are not arbitrary but derived from decades of industry experience documented by organizations like the Rack Manufacturers Institute .
Concentrated versus uniform loading dramatically affects beam performance in ways that sophisticated beam racking layout planning must address. Recent research from the University of Kragujevac demonstrates that longitudinal pallet placement—with pallet stringers running parallel to beams—distributes loads more evenly across beam spans, reducing maximum deflection by up to 23% compared to transverse placement where pallet stringers run perpendicular. This finding has significant implications for beam racking layout planning, as it suggests that pallet orientation can be optimized to improve structural performance without increasing material costs .
2.3 Aisle Width Optimization: The Density-Accessibility Tradeoff
Aisle width decisions during beam racking layout planning fundamentally determine a facility’s storage capacity and operational velocity. Every meter of aisle width sacrificed increases potential storage density but potentially reduces forklift maneuverability and operator productivity.
Counterbalance forklift operations require the widest aisles of any common equipment type—typically 3.5 to 4.0 meters for standard 1,200mm x 1,000mm pallets. When beam racking layout planning specifies counterbalance equipment, engineers design aisles that accommodate right-angle stacking dimensions with 200mm clearance on each side for safety. These wider aisles reduce theoretical maximum density but offer equipment flexibility and lower capital costs .
Reach truck configurations enable narrower aisles of 2.8 to 3.2 meters through design features that reduce turning radius requirements. These trucks use outriggers or stabilizing legs that extend beneath the bottom beam, requiring careful beam racking layout planning to ensure bottom beam heights accommodate leg entry—typically 150-200mm of clearance. The density improvement over counterbalance layouts ranges from 15-25% depending on specific dimensions .
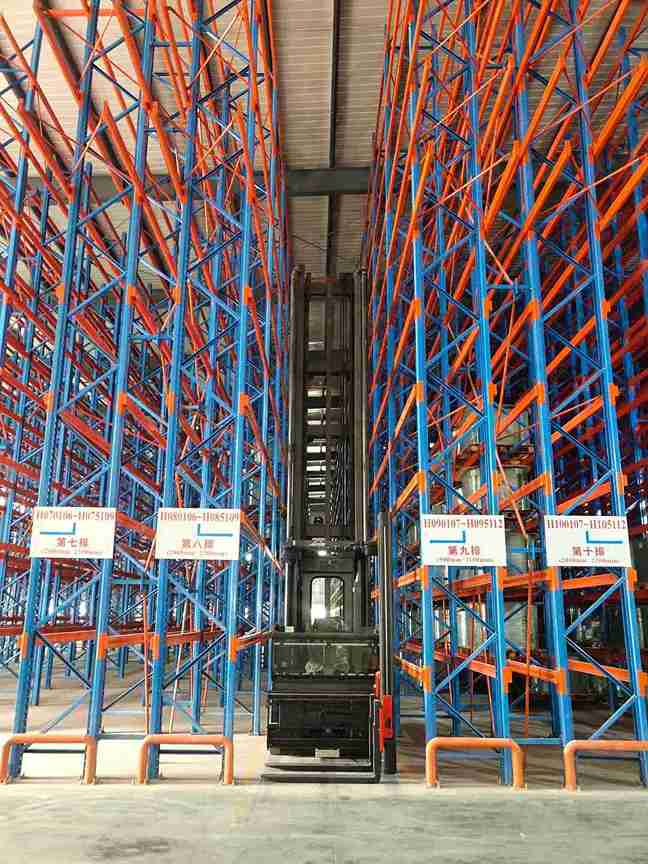
Very narrow aisle (VNA) systems achieve maximum density with aisles of 1.6 to 1.8 meters—less than half the width required for counterbalance operations. However, beam racking layout planning for VNA requires specialized considerations including wire guidance or rail systems, turret trucks with rotating forks, exceptionally flat floors meeting super-flat specifications, and operator training programs. The density gains are substantial—often 40% more positions than counterbalance layouts within the same footprint—but equipment costs are significantly higher and operational flexibility is reduced .
2.4 Inventory Slotting Strategy: Positioning Products for Velocity
Sophisticated beam racking layout planning incorporates inventory velocity analysis to position products optimally within the storage cube, reducing travel distances and improving pick productivity.
ABC analysis forms the foundation of effective slotting during beam racking layout planning. A-movers representing 20% of SKUs but 80% of picks receive prime positions in the “golden zone”—between waist and shoulder height for case picking or at floor level for full-pallet operations—and closest to shipping docks to minimize travel distances. During beam racking layout planning, these positions are allocated first, then surrounding space is filled with lower-velocity B and C items. This simple optimization typically reduces average travel distances by 20-30% with no capital investment .
Family grouping during beam racking layout planning positions related SKUs together in the same storage zone, reducing travel distances for multi-line orders. An automotive parts distributor might store all brake components in adjacent bays, enabling single-stop picking for common maintenance kits. A pharmaceutical distributor might group products by therapeutic category, simplifying both picking and replenishment. This approach requires beam racking layout planning that allocates contiguous zones for each family group rather than scattering related items throughout the facility .
Seasonal adjustments represent advanced beam racking layout planning that anticipates demand fluctuations. Forward-thinking operators reconfigure slotting seasonally, moving holiday merchandise to prime positions before peak periods, then rotating summer products forward as demand shifts. This dynamic approach requires flexible beam racking layout planning that accommodates periodic reconfiguration without major structural changes—adjustable beam connections and modular components that can be relocated as seasonal requirements evolve .
3. The Step-by-Step Beam Racking Layout Planning Process
3.1 Step 1: Comprehensive Warehouse Mapping and Data Collection
Professional beam racking layout planning begins with meticulous site documentation that captures every relevant dimension and condition. Experienced engineers deploy laser distance measurers and 3D scanning equipment to capture:
Column centerline dimensions with verification against as-built conditions
Overhead obstructions including sprinkler drops, HVAC units, conduit runs, and bus ducts
Dock door positions, heights, and approach clearances
Floor elevation changes, slope gradients, and surface flatness
Electrical panel locations and service capacities
Fire suppression control valves and coverage areas
Structural elements including shear walls, expansion joints, and roof supports
This dimensional data feeds directly into beam racking layout planning software, where engineers construct accurate 3D models of the existing space. Unlike simple 2D drawings common in facility documentation, these models reveal interference issues before they become costly installation problems. A sprinkler drop that appears clear of racks in plan view might intersect a beam at a specific elevation—an issue only detectable through comprehensive 3D beam racking layout planning .
3.2 Step 2: Inventory Profiling and Load Characterization
Successful beam racking layout planning requires intimate knowledge of what will be stored in the facility, now and in the future. Engineers conduct comprehensive inventory audits documenting:
Pallet dimensions including overhang beyond pallet edges and underhang where loads are smaller than pallets
Weight variations across SKUs and receiving batches, including seasonal fluctuations
Storage requirements including FIFO (first-in, first-out), LIFO (last-in, first-out), or batch storage based on product characteristics
Special handling needs including temperature control, hazardous materials segregation, high-value security, and dated product rotation
Pallet condition including warped boards, damaged stringers, and non-standard configurations
This profiling directly influences beam racking layout planning decisions at every level. Heavy loads require shorter beam spans or heavier beam sections. Oversized pallets demand increased beam depth or modified step dimensions. FIFO requirements might suggest flow rack integration rather than standard selective configurations. Facilities handling multiple pallet types may require beam racking layout planning that creates dedicated zones for each format, maximizing efficiency within each zone rather than compromising throughout the facility .
3.3 Step 3: Configuration Modeling and Iterative Optimization
With dimensional and inventory data loaded, engineers begin iterative beam racking layout planning using specialized configurator software. Each iteration tests different variables and combinations:
Bay spacing variations to optimize column utilization and minimize wasted space
Beam level heights accommodating diverse pallet configurations while maximizing vertical utilization
Aisle width variations balancing density improvements against equipment requirements
Cross-aisle positioning maximizing dock door utilization and minimizing travel distances
Rack orientation options including parallel, perpendicular, or angled configurations relative to docks
Modern beam racking layout planning tools generate heat maps showing pick frequencies superimposed on rack layouts, revealing inefficiencies before steel touches concrete. These visualizations make it obvious when fast-moving items are positioned too far from docks or when slow movers occupy prime real estate. Engineers typically run 20-30 iterations during comprehensive beam racking layout planning, each refining the previous version based on quantitative performance metrics including travel distance, pick productivity, and space utilization .
3.4 Step 4: Safety Integration and Code Compliance Verification
No beam racking layout planning exercise is complete without rigorous safety verification against applicable codes and standards. Engineers cross-reference proposed layouts against:
Local building codes governing seismic design categories and lateral force resistance
Fire protection standards requiring specific flue spaces between rows and between loads and sprinklers
International Fire Code regulations for sprinkler obstruction and clearance requirements
OSHA or local occupational safety requirements for aisle clearance and egress pathways
Rack Manufacturers Institute standards for load capacity and system design
In seismic zones across Latin America, Southeast Asia, and parts of the Middle East, beam racking layout planning must incorporate additional bracing, baseplate configurations, and frame reinforcements beyond standard designs. Engineers coordinate with structural engineers specializing in seismic design to validate that proposed configurations meet or exceed local requirements. The recent installation for Buencafé in Colombia demonstrates how professional beam racking layout planning addresses seismic risk while maintaining operational efficiency in high-hazard zones .
3.5 Step 5: Implementation Sequencing and Migration Planning
The final beam racking layout planning phase addresses how to transition from current operations to future state without disrupting customer service or creating safety hazards. Experienced engineers develop phased implementation plans that:
Sequence rack installation around active storage areas to maintain operations throughout construction
Coordinate forklift availability for content shifting during off-hours
Schedule work during lowest-activity periods based on historical order patterns
Establish temporary overflow storage for displaced inventory during reconfiguration
Plan material deliveries to match installation sequences, avoiding on-site storage congestion
This operational focus distinguishes professional beam racking layout planning from theoretical exercises. The best layout delivers zero value if it cannot be implemented without shutting down the business. Phased approaches may extend total project duration but ensure business continuity, making them preferable for most operating facilities .
4. Advanced Strategies for Maximum Density Optimization
4.1 Vertical Space Exploitation: Going Higher, Not Wider
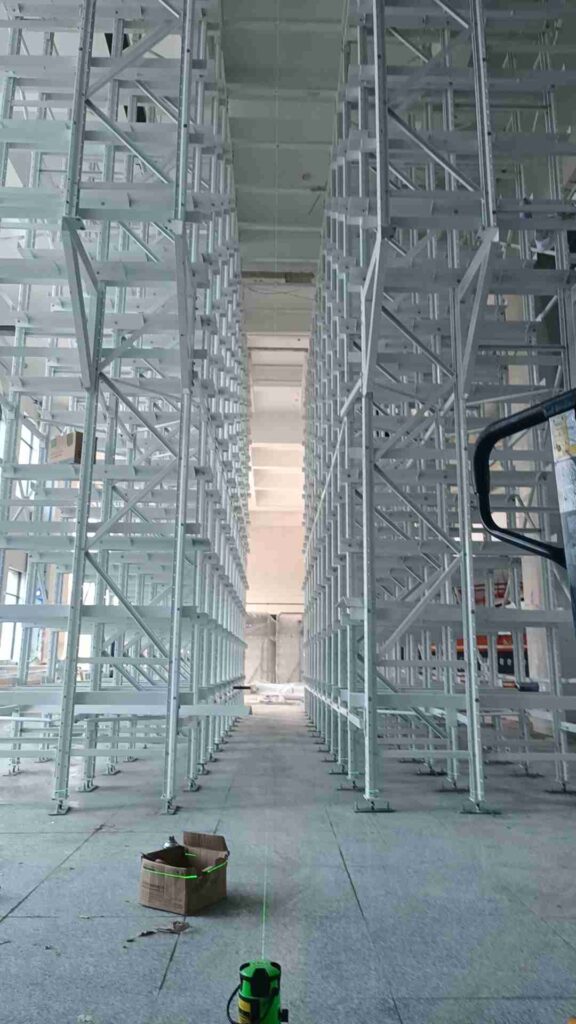
The single greatest opportunity in beam racking layout planning remains underutilized vertical space—what industry professionals call “the fifth wall.” Throughout work in markets from Dubai to Mexico City, engineers consistently find warehouses with 12-meter clear heights using only 6-7 meters for storage, leaving half their potential capacity untapped.
High-bay racking systems extending to 15 meters and beyond require specialized beam racking layout planning considerations that differ significantly from standard installations. Upright frames must be spliced at shipping-friendly lengths (typically 6-8 meters), requiring precise splice location planning to maintain structural integrity. Beam placement must accommodate varying reach requirements at different elevations—top beams may need different spacing than bottom beams based on picking methods. Most critically, forklift specifications must match elevated reach requirements, with mast heights sufficient for top-level access and operator visibility maintained at all elevations .
Mezzanine integration during beam racking layout planning creates entirely new storage levels above floor-level operations, effectively doubling or tripling usable square footage without expanding the building footprint. By installing structural mezzanines over shipping and receiving areas, above battery charging stations, or over low-bay office space, engineers capture previously wasted vertical volume. Beam racking layout planning for mezzanine areas must account for column transfer loads from upper levels to foundations, egress requirements including stairs and railings, and vertical material handling through lifts or conveyors. The 1.086 million square foot Ohio facility case study demonstrates how integrated mezzanine design during beam racking layout planning creates multiple storage levels while maintaining efficient material flow throughout the facility .
4.2 Narrow Aisle Conversion: Density Without Automation
For many operators in emerging markets where capital for full automation is limited, converting from standard to narrow aisle configurations represents the most cost-effective density improvement available. Professional beam racking layout planning for narrow aisle conversion typically includes:
Replacing counterbalance trucks with reach trucks (moderate investment, typically $50,000-$80,000 per truck)
Implementing wire guidance or rail systems (higher investment, typically $15,000-$25,000 per aisle)
Training operators in precision maneuvering techniques specific to narrow aisle operation
Installing aisle entry guides and speed reduction zones to protect rack structures
Verifying floor flatness meets reach truck manufacturer requirements
The density gains from this approach are substantial. Converting from 3.8-meter aisles to 2.8-meter aisles through thoughtful beam racking layout planning increases storage positions by 25-30% within the same footprint. When combined with increased height utilization—raising storage from 8 meters to 11 meters, for example—total capacity improvements of 40-50% are consistently achievable without expanding the building or implementing complex automation .
4.3 Hybrid System Integration: Matching Technology to Requirements
Sophisticated beam racking layout planning rarely specifies a single rack type throughout a facility. Instead, experienced engineers design hybrid configurations that match storage technology to product characteristics, creating optimal solutions for each inventory segment:
Selective racking occupies prime locations for fast-moving SKUs requiring immediate accessibility. During beam racking layout planning, selective racks are positioned closest to shipping docks and along primary travel paths, minimizing travel distances for high-volume picks. The 100% accessibility of selective configurations justifies their lower density for A-movers where access frequency is high .
Double-deep racking serves medium-velocity products where some access compromise is acceptable. Beam racking layout planning for double-deep requires specialized reach trucks with pantograph mechanisms extending forks into the second position, but delivers density improvements of 30-40% over selective configurations. Products stored here are those picked less frequently than once per week on average .
Drive-in racking provides maximum density for bulk storage of uniform products with very low access frequency. Professional beam racking layout planning reserves drive-in for slow-moving, large-quantity items where LIFO rotation is acceptable—typically seasonal merchandise, safety stock, or raw materials with long shelf life. The density improvement over selective can exceed 60% for deep-lane configurations .
Push-back and flow rack systems offer density with improved access compared to drive-in. During beam racking layout planning, these systems are specified for medium-velocity products where FIFO rotation matters, such as food and beverage applications with expiration dating. Push-back systems using nested carts typically store 2-4 pallets deep, while flow racks with gravity rollers can extend to much greater depths .
4.4 Dynamic Slotting Optimization: Continuous Improvement Culture
Leading operators recognize that beam racking layout planning is not a one-time event but an ongoing process requiring continuous attention and adjustment. These organizations implement dynamic slotting programs that maintain optimization as inventory profiles evolve:
Quarterly velocity reviews use WMS data to identify shifting demand patterns before they create significant inefficiencies. Beam racking layout planning adjustments are scheduled based on these reviews, moving newly-fast SKUs to prime positions while relegating slowing items to peripheral locations. This continuous realignment maintains pick productivity at peak levels year-round .
Seasonal reconfiguration for peak periods represents advanced beam racking layout planning that anticipates demand fluctuations. During Ramadan in Middle Eastern markets, Christmas across Latin America, or harvest seasons in agricultural regions, select areas are temporarily reconfigured for promotional or seasonal merchandise, then restored to standard configurations post-peak. This approach requires beam racking layout planning that anticipates these periodic changes, designing systems that can be reconfigured efficiently .
Continuous slotting optimization through WMS-directed putaway ensures new receipts are positioned according to current velocity classifications rather than static assignments. When WMS integrates with beam racking layout planning data, it can direct incoming product to the optimal location based on current demand patterns, available space, and product characteristics. This operational integration ensures the theoretical benefits of beam racking layout planning are realized daily rather than remaining abstract concepts .
5. Automation Integration in Modern Beam Racking Layout Planning
5.1 AGV and AMR Compatibility Considerations
As autonomous mobile robots become increasingly viable in emerging markets, beam racking layout planning must evolve to accommodate these technologies effectively. AGV integration introduces new constraints and opportunities that fundamentally change layout design:
Navigation pathway requirements during beam racking layout planning must account for AGV guidance systems, whether magnetic tape, QR code, laser guidance, or natural feature navigation. Each technology requires specific floor conditions, pathway clearances, and infrastructure. Beam racking layout planning for AGV-equipped facilities maintains consistent aisle widths throughout, avoiding the bottlenecks and pinch points that confuse autonomous navigation and cause system lockups.
Charging station positioning during beam racking layout planning allocates dedicated space for AGV replenishment without disrupting material flow. Engineers typically position charging zones adjacent to shipping areas, allowing opportunity charging during loading and unloading cycles rather than requiring dedicated downtime for battery swaps. This integration requires beam racking layout planning that anticipates traffic patterns and positions charging infrastructure for maximum efficiency.
Fleet management integration during beam racking layout planning considers traffic patterns and intersection management for multiple vehicles operating simultaneously. Multiple AGVs sharing aisles require thoughtful path design to prevent deadlocks and optimize throughput. Advanced beam racking layout planning for AGV facilities includes passing zones, intersection protocols, and traffic separation strategies that maintain productivity as fleet size grows .
5.2 Automated Storage and Retrieval System (AS/RS) Planning
For high-throughput operations, beam racking layout planning increasingly incorporates AS/RS technology that fundamentally changes storage economics and operational capabilities:
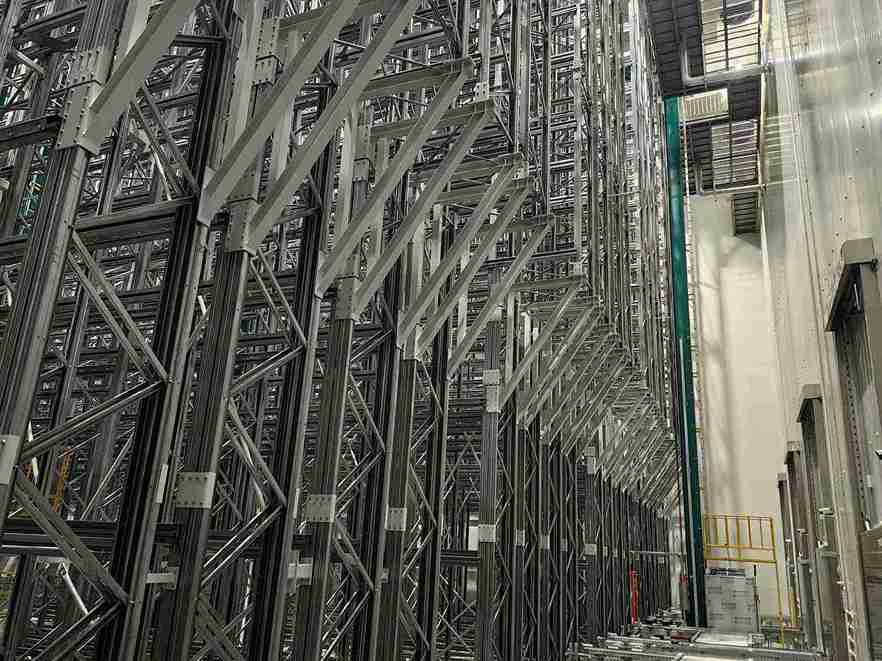
Stacker crane systems operate within dedicated aisles, requiring beam racking layout planning that precisely aligns rack structures with rail systems and crane specifications. Tolerances are significantly tighter than manual systems—typically ±3mm versus ±10mm for conventional rack installation. Beam racking layout planning for AS/RS must account for crane positioning accuracy, acceleration forces, and maintenance access requirements that don’t exist in manual systems.
Shuttle-based systems use autonomous vehicles operating within rack levels, dramatically increasing throughput capacity compared to single-crane systems. During beam racking layout planning, shuttle systems require additional structural considerations for rail support across all storage levels and shuttle charging stations positioned at aisle ends. The density potential of shuttle systems exceeds conventional AS/RS, making them attractive for high-throughput distribution centers .
5.3 Conveyor Integration for Seamless Material Flow
Connecting storage to fulfillment operations requires careful beam racking layout planning that integrates conveyor systems as seamless extensions of the storage infrastructure:
Pick-face conveyor positioning during beam racking layout planning must align with order consolidation requirements and pick module design. Engineers typically position takeaway conveyors at aisle ends, with spur conveyors extending into pick faces for high-volume operations. This integration requires beam racking layout planning that coordinates rack placement with conveyor routing, ensuring smooth material flow without creating obstacles or pinch points.
Merge and sortation zones during beam racking layout planning require substantial space for induction, merging, sorting, and takeaway operations. These areas are allocated adjacent to storage blocks, minimizing travel distances between pick faces and sortation systems while maintaining adequate buffer capacity for peak periods. Professional beam racking layout planning ensures these zones are sized appropriately for current volumes and future growth .
5.4 Future-Proofing Layouts for Emerging Technologies
The accelerating pace of warehouse automation demands that current beam racking layout planning accommodate technologies not yet specified or even invented:
Modular design principles during beam racking layout planning specify rack components that can be reconfigured as technology evolves. Adjustable beam connections, standardized frame dimensions, and compatible component interfaces ensure today’s investment supports tomorrow’s automation. When new picking technologies emerge, facilities with modular beam racking layout planning can adapt without replacing their entire storage infrastructure.
Infrastructure预留 during beam racking layout planning includes conduit placement for future guidance systems, power capacity for charging stations, network infrastructure for equipment communication, and floor preparation for future rail systems. These relatively minor investments during initial beam racking layout planning prevent costly retrofits when automation decisions are ultimately made, potentially saving millions in future implementation costs .
6. Industry-Specific Beam Racking Layout Planning Applications
6.1 Manufacturing and Assembly Operations
In manufacturing environments across Thailand, Vietnam, Mexico, and other emerging production hubs, beam racking layout planning must balance raw material storage with work-in-process and finished goods requirements in ways that support production schedules:
Raw material staging during beam racking layout planning positions incoming materials adjacent to point-of-use locations on the production floor. For automotive manufacturers, this might mean sequencing racks delivering components directly to assembly lines in precise order matching production sequence. This just-in-time approach requires beam racking layout planning that integrates with production scheduling systems and provides visibility to replenishment triggers.
Work-in-process storage during beam racking layout planning accommodates buffers between production operations where rates differ. These areas require high accessibility for frequent putaway and retrieval, typically using selective or double-deep configurations positioned between production cells. Beam racking layout planning for WIP must account for varying container sizes, lot tracking requirements, and quick changeover capabilities.
Finished goods staging during beam racking layout planning consolidates completed products awaiting shipment. These areas benefit from high-density configurations, as finished goods typically move in full-pallet quantities and can tolerate some access compromise. Drive-in or push-back systems often serve finished goods effectively, maximizing capacity within limited staging areas .
6.2 Cold Chain and Temperature-Controlled Storage
Refrigerated and frozen warehouses present unique beam racking layout planning challenges that differ significantly from ambient temperature facilities:
Thermal barrier considerations during beam racking layout planning minimize temperature loss during door openings and maintain consistent conditions throughout the space. Engineers position high-velocity items closest to dock doors, reducing exposure duration for temperature-sensitive products while positioning slow movers deeper in the space where temperature stability is greatest.
Frost accumulation management during beam racking layout planning addresses air circulation requirements essential for maintaining temperature and preventing ice buildup. Proper flue spacing between racks and between back-to-back rows prevents frost bridges that accelerate temperature loss and increase energy consumption. Beam racking layout planning for cold storage must maintain these clearances while maximizing density—a challenging balance requiring experienced engineering.
Defrost cycle accommodation during beam racking layout planning ensures equipment clearance for evaporator units and defrost water drainage. Rack placement must avoid obstructing airflow from evaporators while providing access for maintenance. In facilities with ceiling-mounted evaporators, beam racking layout planning must coordinate rack heights with equipment clearances to maintain proper air circulation throughout the space .
6.3 E-commerce and Multi-Channel Fulfillment
The explosive growth of e-commerce across Southeast Asia and Latin America demands beam racking layout planning optimized for piece-picking rather than full-pallet movement:
Carton flow integration during beam racking layout planning positions fast-moving SKUs in flow racks for efficient piece picking from the front while replenishment occurs from the rear. These systems automatically rotate inventory, maintaining FIFO compliance for dated products while maximizing pick-face density. Beam racking layout planning for carton flow must account for lane depths, product dimensions, and replenishment frequencies.
Pick module design during beam racking layout planning creates密集 picking environments where order selectors access multiple SKUs within minimal travel distances. Multi-level pick modules with integrated conveyors dramatically improve throughput compared to single-level picking. Professional beam racking layout planning for pick modules integrates vertical lifts or conveyors connecting levels, ensuring product flows efficiently from storage to packing.
Buffer area allocation during beam racking layout planning accommodates order consolidation, packing operations, and outbound staging. These areas require substantial space adjacent to pick modules, sized for peak season volumes rather than averages. Beam racking layout planning that underestimates buffer requirements creates bottlenecks that limit overall facility throughput .
6.4 Third-Party Logistics and Multi-Client Operations
3PL operators serving multiple clients demand flexible beam racking layout planning that accommodates varying requirements without sacrificing efficiency:
Dedicated versus shared storage during beam racking layout planning addresses client segregation requirements. Some clients require physical separation of inventory with dedicated rack zones, while others permit commingled storage with SKU-level identification. Beam racking layout planning for 3PL facilities typically creates a mix of dedicated zones for key clients and flex space that can be allocated dynamically.
Variable rack configurations during beam racking layout planning accommodate different client pallet profiles within the same facility. Adjustable beam positions and modular components enable rapid reconfiguration as client requirements change or as new clients are onboarded. This flexibility is essential for 3PL operators whose business mix evolves continuously .
7. Common Beam Racking Layout Planning Mistakes and Solutions
7.1 Mistake: Ignoring Future Growth Requirements
Engineers frequently encounter facilities where beam racking layout planning considered only current inventory levels, leaving no room for expansion and forcing costly retrofits within months of installation. The solution involves designing for modular expansion from the outset:
Reserved expansion zones during initial beam racking layout planning preserve specific areas for future rack installation. These areas might temporarily store slow-moving items on floor positions or serve as staging areas, with infrastructure in place for future rack installation including floor reinforcement, power availability, and clearance verification.
Scalable rack designs during beam racking layout planning specify components that accept future additions without replacement. Upright frames designed for future height extensions through splice connections, beam connectors compatible with additional levels, and anchor patterns accommodating expanded footprints all support growth without requiring system replacement. This forward-thinking approach may increase initial investment slightly but pays dividends when expansion occurs .
7.2 Mistake: Inadequate Aisle Space for Equipment Maneuvering
Even properly dimensioned aisles can prove inadequate if beam racking layout planning intersection clearances and turning radii. Experienced engineers address this through:
Turning radius verification during beam racking layout planning using CAD simulations of actual equipment models rather than theoretical dimensions. Standard aisle widths calculated from manufacturer specifications may prove insufficient at intersections where multiple turns occur sequentially or where equipment approaches at angles.
Widened intersection zones during beam racking layout planning provide additional clearance where maneuvering complexity increases. These widened areas add 300-500mm to standard aisle dimensions at critical points, providing margin for operator error and accommodating future equipment changes.
Equipment specification alignment during beam racking layout planning ensures actual forklift dimensions match design assumptions. When facilities use mixed equipment fleets, beam racking layout planning must accommodate the largest units in the fleet, not just the typical ones .
7.3 Mistake: Uneven Load Distribution Causing Structural Issues
Improper beam racking layout planning regarding load distribution leads to premature structural failure, excessive deflection, and safety hazards. Prevention strategies include:
Load capacity signage at each rack row specifying maximum weights per beam level and per bay. During beam racking layout planning, signage locations are designed to remain visible to operators from equipment operating positions, ensuring capacity information is readily available when needed.
Beam deflection monitoring programs that regularly inspect for sagging or deformation beyond acceptable limits. Early detection during beam racking layout planning follow-up prevents catastrophic failures by identifying issues before they escalate. Recent research on pallet placement methods demonstrates that monitoring programs focused on critical locations identified during beam racking layout planning provide the best return on inspection investment .
7.4 Mistake: Poor Dock Door Alignment
Beam racking layout planning that fails to align storage with dock doors creates unnecessary travel distances that compound over thousands of daily movements. Solutions include:
Velocity-based positioning during beam racking layout planning placing fastest-moving SKUs closest to primary shipping docks. This simple adjustment reduces average travel distances by 20-30% with no capital investment, simply by aligning storage with demand.
Cross-dock consideration during beam racking layout planning positions receiving adjacent to shipping where cross-docking opportunities exist. This alignment enables direct transfer without intermediate storage, reducing handling costs and improving throughput for appropriate products.
Dock assignment optimization during beam racking layout planning matches dock positions to storage zones based on product velocity. High-volume outbound products receive dock positions closest to their storage locations, while low-volume products use more distant docks .
7.5 Mistake: Inadequate Maintenance Access
Beam racking layout planning frequently overlooks maintenance requirements for building systems, creating future access problems. Experienced engineers address this through:
Equipment clearance zones during beam racking layout planning providing access to electrical panels, fire protection equipment, sprinkler control valves, and HVAC units. These zones remain unobstructed despite dense storage configurations, ensuring maintenance personnel can access critical systems without moving product.
Maintenance pathways during beam racking layout planning ensuring service personnel can reach building systems efficiently. These pathways may be narrower than equipment aisles but must accommodate personnel with tools and test equipment.
Sprinkler clearance verification during beam racking layout planning ensuring overhead fire protection remains effective. Rack placement must maintain required clearances below sprinkler deflectors, and flue spaces between racks must allow proper sprinkler coverage .
8. Financial Analysis and ROI of Professional Layout Planning
8.1 Quantifying Capacity Gains from Optimized Planning
The financial case for professional beam racking layout planning rests on demonstrable capacity improvements verified through thousands of implementations. Based on documented results across emerging markets, industry data shows:
Average capacity increases of 35-45% through comprehensive beam racking layout planning that addresses all aspects of storage optimization. This represents the combined effect of height utilization improvements, aisle width optimization, and slotting efficiency working together.
Range of outcomes varies significantly based on starting condition. Facilities with severe underutilization—common in older warehouses or those that have grown organically without professional planning—achieve 60%+ gains through beam racking layout planning. Already-efficient operations with professional management might gain 15-20%, still representing substantial value.
Capacity valuation during beam racking layout planning calculations uses local construction costs or rental rates to quantify space savings in financial terms. A 40% capacity gain in a 10,000-square-meter facility effectively adds 4,000 square meters of storage—worth $400,000 to $800,000 annually in most major markets when valued at local rental rates. This valuation provides the foundation for ROI calculations that justify professional planning investment .
8.2 Operational Efficiency Improvements and Labor Savings
Beyond space savings, professional beam racking layout planning delivers substantial operational benefits that compound the financial case:
Travel distance reductions of 25-35% through optimized beam racking layout planning directly translate to labor savings that appear on the profit and loss statement monthly. For facilities with 20 order pickers, this represents 5-7 full-time equivalents annually—potentially $150,000-$250,000 in labor cost reduction depending on local wage rates.
Pick productivity improvements of 20-30% result from ergonomic slotting during beam racking layout planning. When fast-moving items occupy golden-zone positions at waist height, pick rates increase substantially while error rates decrease. These productivity gains compound with travel distance reductions, creating multiplicative benefits.
Damage rate reductions of 15-25% follow proper beam racking layout planning that provides adequate clearances and eliminates tight spots where product damage occurs. Reduced damage means lower write-offs, fewer customer complaints, and less rework—all contributing to improved profitability .
8.3 Safety Cost Avoidance
Perhaps the most compelling ROI component involves safety improvements from proper beam racking layout planning:
Incident reduction of 40-60% in facilities with professionally-planned layouts compared to similar facilities without professional planning. Proper aisle widths, clear sight lines, adequate clearances, and proper load distribution prevent common forklift accidents that cause injury and damage.
Insurance premium impacts following professional beam racking layout planning often yield 10-20% reductions. Insurers recognize the risk mitigation inherent in properly engineered storage systems, particularly when layouts follow recognized standards and include appropriate safety features.
Regulatory compliance assurance during beam racking layout planning prevents fines and shutdown orders that can arise from code violations. In many markets, regulatory enforcement is increasing, making compliance an essential business requirement .
9. Implementation Best Practices for Emerging Markets
9.1 Navigating Local Conditions and Constraints
Beam racking layout planning in Southeast Asian, Middle Eastern, African, and Latin American markets must account for region-specific factors that differ from North American or European operations:
Climate considerations during beam racking layout planning address humidity, temperature extremes, and corrosion risks that affect steel performance. Coastal facilities in Vietnam, Indonesia, or Mexico require enhanced corrosion protection for rack components, including heavier galvanization or specialized coatings. High-humidity environments may require additional flue spacing for air circulation.
Power reliability during beam racking layout planning for automated facilities includes backup power provisions and manual override capabilities essential for maintaining operations during grid instability. Uninterrupted operation despite unreliable utility power requires thoughtful system design including UPS systems for controls and generator capacity for critical functions.
Local material availability during beam racking layout planning specifies components available through local distribution networks when possible. This ensures timely repairs and modifications without reliance on international shipping, which can delay critical maintenance for weeks or months .
9.2 Phased Implementation for Operational Continuity
Successful beam racking layout planning implementations in operating facilities require careful staging that maintains business operations throughout construction:
Weekend-only installation programs during beam racking layout planning execution minimize operational disruption by confining work to non-business hours. By sequencing work around business hours, major reconfigurations are completed without lost productivity, though project duration extends.
Inventory relocation planning during beam racking layout planning addresses product movement requirements in detail. Temporary overflow areas, sequenced transfers, and coordinated equipment availability ensure smooth transitions without stock-outs or shipping delays.
Parallel operations during complex beam racking layout planning implementations maintain service levels from existing areas while new areas are prepared. This approach requires additional temporary space but ensures business continuity throughout the project .
9.3 Training and Change Management
The best beam racking layout planning delivers full value only when operators understand and embrace the new configuration:
Operator involvement during beam racking layout planning builds buy-in and captures practical insights that improve final designs. Experienced operators often identify nuances—specific product quirks, equipment limitations, seasonal patterns—that improve layout effectiveness.
Formal training programs following beam racking layout planning implementation ensure all personnel understand new slotting logic, safety procedures, and equipment requirements. Training effectiveness directly correlates with realized benefits from new layouts.
Performance monitoring after beam racking layout planning implementation verifies expected benefits and identifies areas requiring adjustment. This feedback loop closes the planning cycle, ensuring continuous improvement .
10. Future Trends in Beam Racking Layout Planning
10.1 Digital Twin Integration
Emerging beam racking layout planning methodologies increasingly leverage digital twin technology that creates virtual replicas of physical facilities:
Real-time layout optimization using digital twins enables continuous refinement based on operational data streaming from WMS and equipment telematics. As systems track actual travel distances, pick times, and congestion patterns, beam racking layout planning models update to reflect operational reality rather than theoretical assumptions.
What-if simulation during beam racking layout planning allows operators to test configuration changes virtually before committing resources. This capability reduces implementation risk and accelerates optimization cycles, enabling more frequent adjustments as business conditions evolve.
Predictive analytics integrated with beam racking layout planning models forecast future requirements based on demand projections, enabling proactive rather than reactive configuration changes .
10.2 Sustainability Considerations
Environmental imperatives increasingly influence beam racking layout planning decisions across global markets:
Energy efficiency during beam racking layout planning for refrigerated facilities optimizes air circulation and minimizes temperature loss through strategic rack placement. Proper flue spacing, aisle orientation relative to airflow, and positioning relative to evaporators all affect energy consumption.
Material optimization during beam racking layout planning specifies recycled-content steel when available and designs that minimize material usage while maintaining structural integrity. Lighter structures reduce embodied carbon while meeting all performance requirements.
Lifecycle assessment during beam racking layout planning evaluates total environmental impact from material extraction through manufacturing, installation, operation, and eventual recycling. This comprehensive view identifies opportunities for improvement unavailable when considering only initial impacts .
10.3 Artificial Intelligence in Layout Optimization
AI-powered tools are transforming beam racking layout planning capabilities in ways that were impossible just years ago:
Machine learning algorithms analyzing millions of potential beam racking layout planning configurations identify optimal solutions beyond human capability. These systems consider hundreds of variables simultaneously—inventory velocity, equipment constraints, seasonal patterns, future projections—finding configurations that balance competing objectives more effectively than manual methods.
Generative design during beam racking layout planning produces layout alternatives based on specified parameters, then evaluates each against performance criteria. Engineers review the most promising options, combining machine-generated possibilities with human judgment.
Reinforcement learning applied to beam racking layout planning continuously improves recommendations based on actual operational outcomes, creating systems that get smarter with each implementation .
Conclusion: Transforming Warehouse Economics Through Strategic Layout Planning
Beam racking layout planning represents the single most powerful lever available to warehouse operators seeking competitive advantage in today’s demanding markets. Through systematic application of the principles outlined in this comprehensive guide, facilities across Southeast Asia, the Middle East, Africa, and Latin America can achieve 40% or greater capacity increases without costly expansions—transforming operational economics and improving profitability.
The combination of vertical space utilization, aisle width optimization, inventory slotting discipline, and strategic automation integration creates compounding benefits that extend far beyond simple storage density. When warehouses optimize their layouts professionally, they reduce labor costs, improve safety, enhance customer service, and position themselves for future growth. These benefits flow directly to the bottom line, funding further improvements and creating competitive advantage.
For organizations ready to transform their warehouse economics, the path forward is clear: begin with comprehensive beam racking layout planning that considers your unique inventory profile, operational requirements, and growth trajectory. Engage specialists who understand both global best practices and local market conditions. Invest in quality components that will support operations for decades. And commit to continuous improvement, recognizing that beam racking layout planning is an ongoing process rather than a one-time event.
The facilities that thrive in coming years will be those that extract maximum value from every cubic meter of existing space. Through professional beam racking layout planning, that future is achievable today for warehouses of any size, in any market, serving any industry.
Frequently Asked Questions
1: How does beam racking layout planning differ for warehouses with irregular shapes or column obstructions?
Irregular warehouses require customized beam racking layout planning that works around obstacles rather than fighting them. Professional engineers typically create multiple zones based on available clear spans, using shorter rack runs in areas with tight column spacing and longer runs where space permits. Column obstructions can be incorporated into rack designs by using narrower bays at column locations or designing cantilevered sections that wrap around obstacles. The key is accepting that perfect uniformity may be impossible while still achieving excellent overall density through creative zone planning. In facilities with severe irregularities, engineers may recommend hybrid systems combining different rack types optimized for each area’s specific constraints.
2: What is the typical timeline from initial beam racking layout planning consultation to fully operational installation?
A comprehensive beam racking layout planning project typically requires 4-8 weeks for initial assessment, design iteration, and final approval, depending on facility complexity and client responsiveness. Manufacturing and delivery of racking components generally takes 8-12 weeks for international projects, though local suppliers in major markets may offer shorter lead times of 4-6 weeks. Installation duration varies with project scale—a 5,000-pallet position installation typically requires 3-4 weeks with a skilled crew working full-time, while larger projects of 20,000+ positions may require 3-4 months. Total project timeline from first consultation to operational handoff averages 4-6 months for facilities in emerging markets, though urgent projects can be accelerated with expedited manufacturing and installation.
3: Can beam racking layout planning accommodate mixed pallet sizes and weights within the same system?
Absolutely—modern beam racking layout planning excels at handling diverse inventory profiles through zone-based design strategies. Heavier pallets are concentrated in areas with shorter beam spans or heavier beam sections specifically engineered for high loads, while lighter items occupy standard zones optimized for their characteristics. For mixed pallet sizes, adjustable beam connections allow different level heights within the same rack run, accommodating varying pallet heights from 800mm to 2,000mm or more. Many facilities benefit from “catch-all” bays with extra height and width flexibility to handle non-standard items, while maintaining efficient standard bays for typical pallets. This approach maximizes overall density while accommodating the full range of inventory requirements.
4: How often should a warehouse undergo formal beam racking layout planning review?
Industry best practice recommends comprehensive beam racking layout planning reviews every 2-3 years for most operations, or whenever significant changes occur in inventory profile, order patterns, or material handling equipment. Additionally, annual slotting reviews should adjust positions within the existing layout framework based on updated velocity data from WMS analytics. Facilities experiencing rapid growth, major business model changes, or significant SKU proliferation may benefit from more frequent reviews—potentially annually. The key indicator that a review is needed is declining pick productivity or increasing congestion despite stable volume—these symptoms suggest layout may be out of alignment with current requirements.
5: What documentation should be received from a professional beam racking layout planning engagement?
A complete beam racking layout planning deliverable package should include: dimensioned CAD drawings showing all rack positions with beam elevations and bay configurations; seismic calculations and structural certifications from qualified engineers where required by local codes; load capacity placards for each rack row meeting regulatory requirements; installation specifications including anchor types, torque requirements, and assembly instructions; seismic gap details and row spacer requirements for earthquake resistance; row spacer locations and specifications; a comprehensive project manual documenting all design decisions, component specifications, and maintenance requirements; and as-built drawings following installation showing any field modifications from original designs. This documentation supports safe operation, simplifies future modifications, and provides crucial evidence for insurance and regulatory compliance.
If you require perfect CAD drawings and quotes for warehouse racking, please contact us. We can provide you with free warehouse racking planning and design services and quotes. Our email address is: jili@geelyracks.com